

Little Luxuries Loft has joined forces with Red Bubble and the Melbourne Victoria State Library for #CreateArtHistory! Artists from around the world participated in an epic art challenge taking inspiration from the library's historic art collection to create their own amazing works! For more information about the contest and it's winners please visit the RedBubble Blog.
While the contest may be over the arts celebration definitely isn't! We created these four paper toy designs also inspired by the Library's stunning art collection. Download the PDF templates and make your own! Assembly instructions and details below. We recommend using white A4 card stock 200 gsm for best results. Happy Crafting Cheers!
DOWNLOAD TEMPLATES HERE>>>
RED MERMAID AND FISH TEMPLATES
RED WIZARD AND KANGAROO TEMPLATES
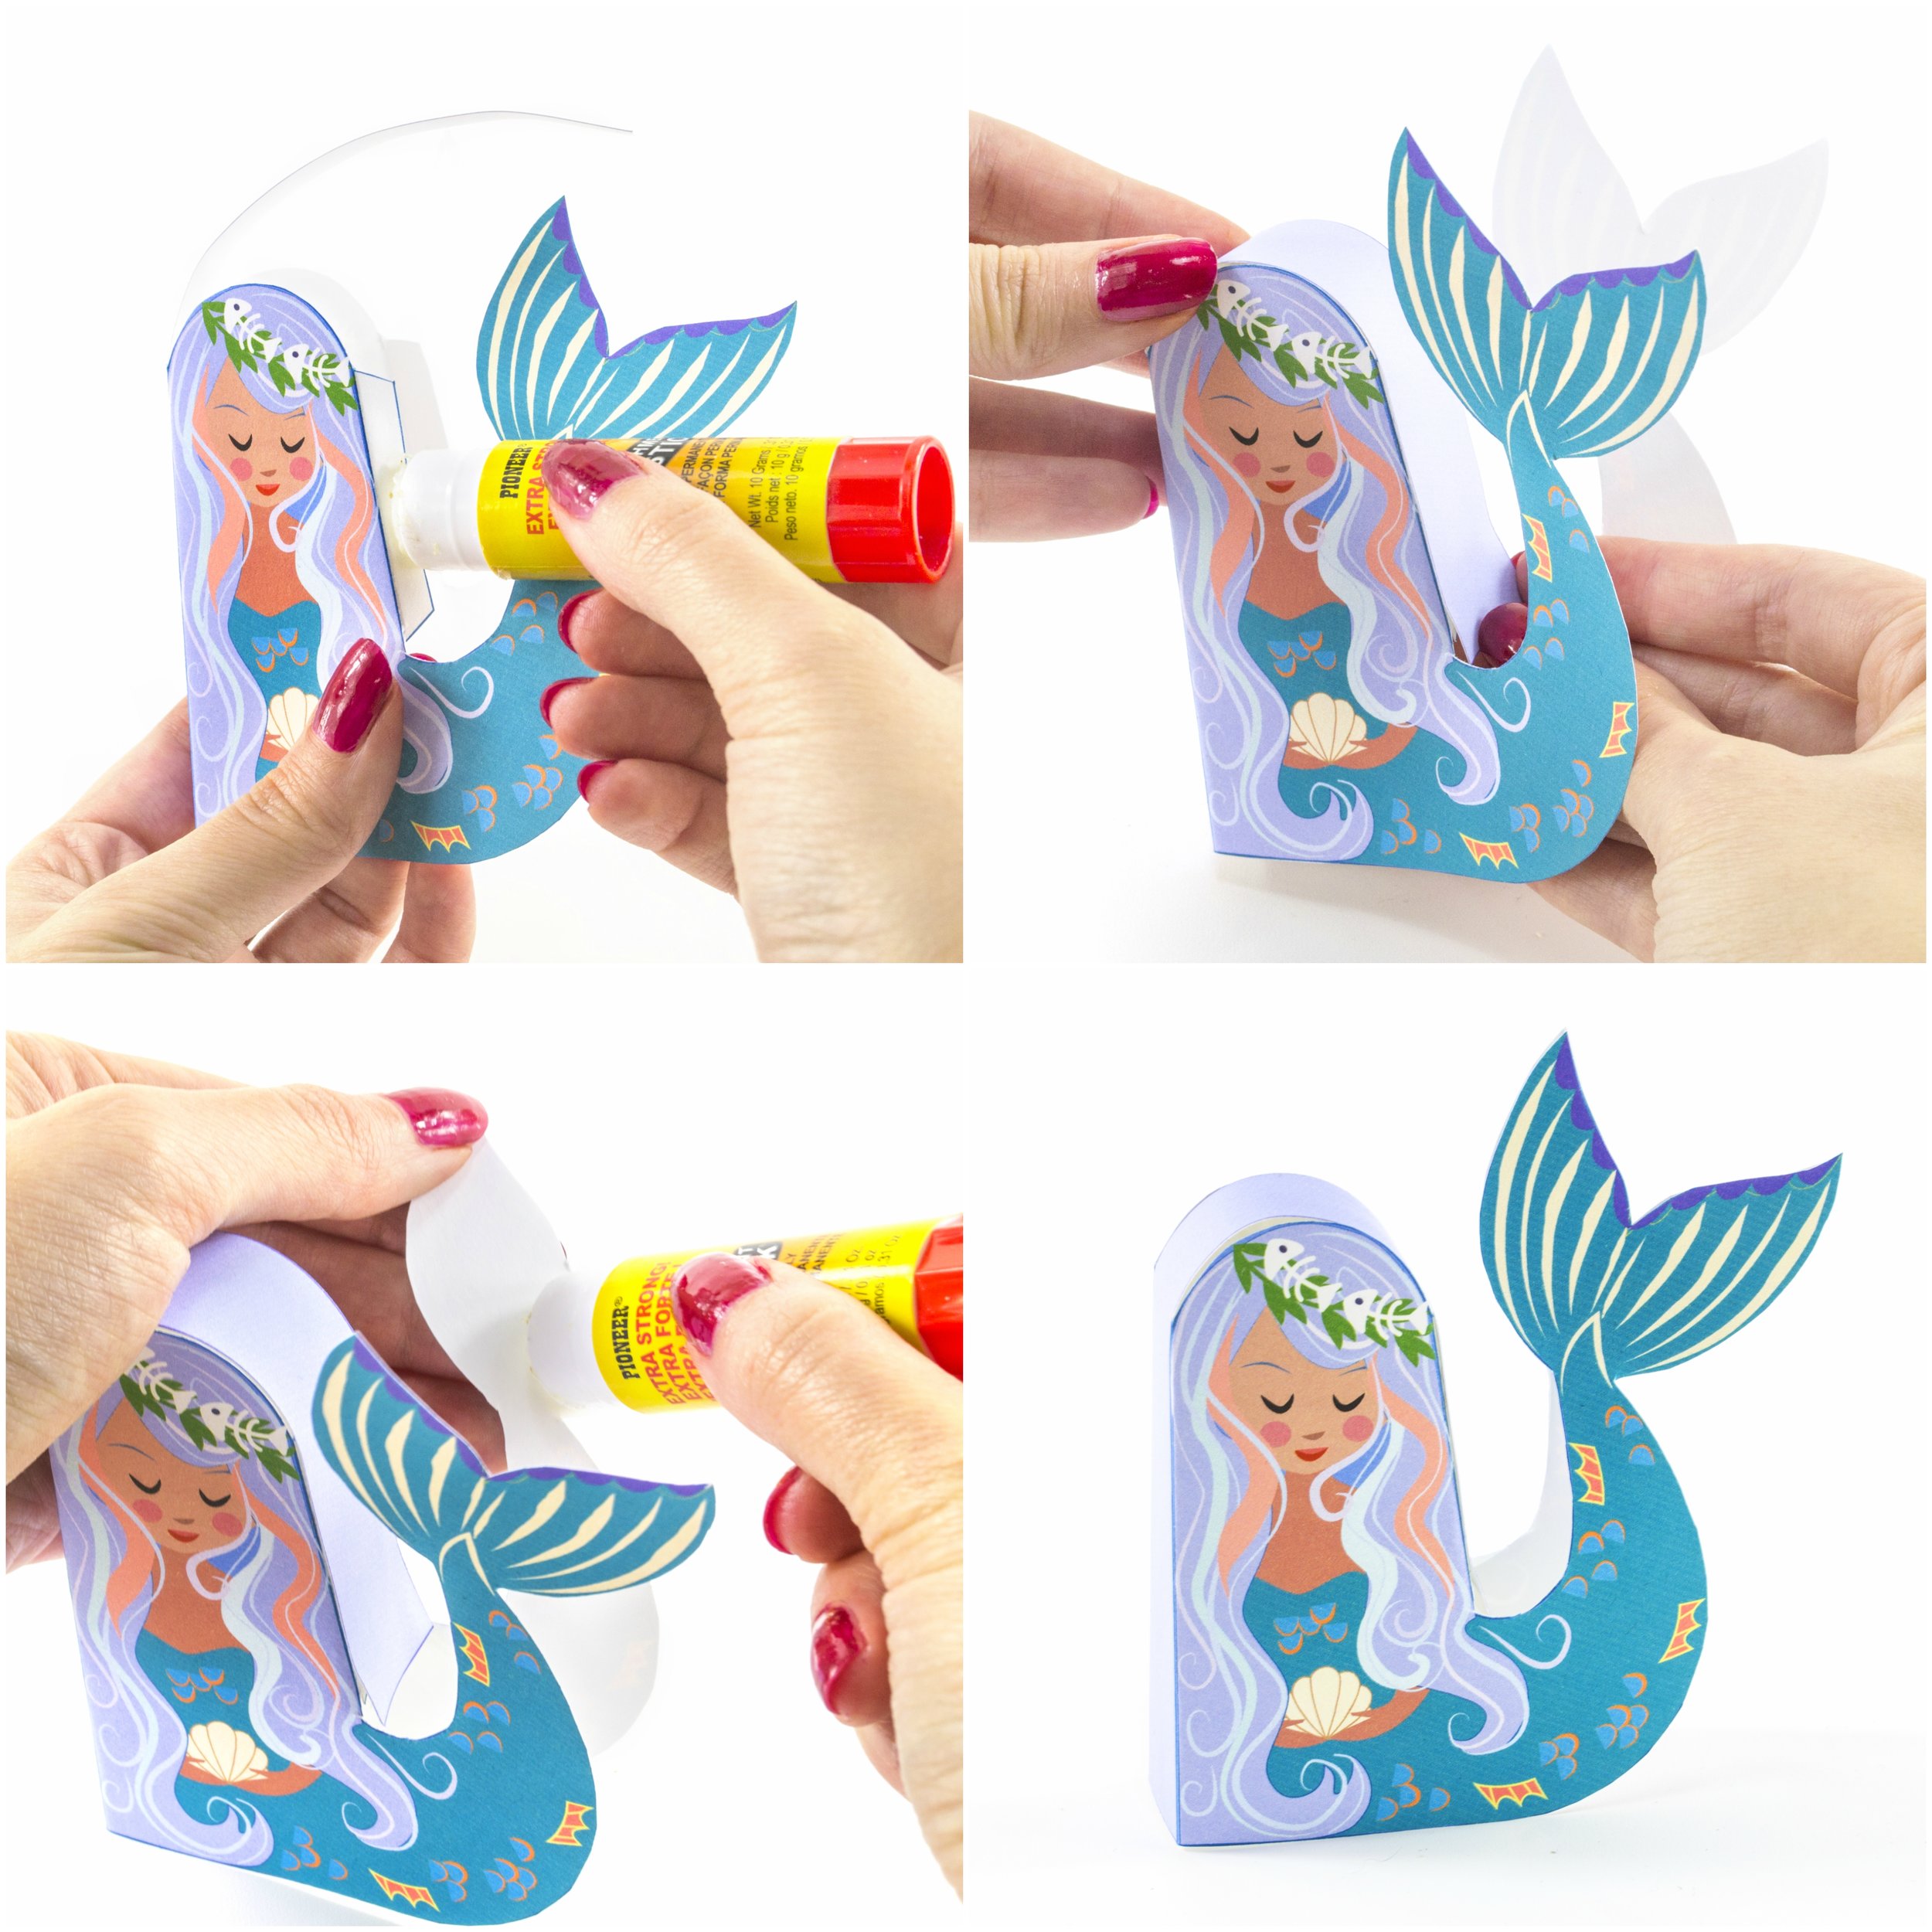
MERMAID ASSEMBLY
1. Crease the edges on either side of the strip and apply glue to
tabs 1.
2. Wrap the strip over the mermaid’s head and align it with
tabs 1 on either side. Hold until dry.
3. Apply glue to the blank side of the tail. Stick the two tail pieces
together.
4. You just mermaid my day! ;)

FISHY ASSEMBLY
1. Fold the top fin in half and apply glue to tabs 1.
2. Fold the main body of the fish in half. Insert the top fin along
the back of the fish. Press and hold until dry.
3. Apply glue to tab 2.
4. Fold in tab 2 and hold the sides of the fish together until dry.
Apply glue to the blank sides of the tails. Hold together until dry.
5. Fold the belly of the fish in half. Apply glue the blank sides of
tabs 3 and 4.
6. Insert the belly of the fish by attaching tabs 3 and 4 to the
sides of the fish. Hold until dry.
7. Bend the side fins so that they lay flat.
8. Crease tabs 5 inwards on top of the fish’s head. Apply glue to
these tabs.
9. Attach tabs 5 to the sides of the head. Hold until dry.
10. Apply glue to the inside of the fish’s head in the bottom
cheek areas.
11. Attach the fish’s head to the body. The slit at the top of the
fish’s head should slide onto the top fin. Press the sides
of the head against the body. Hold until dry.
12. Congrats! You are O-fish-ially done!

KANGAROO ASSEMBLY
1. Crease the all the edges of the kangaroo. Fold all the white tabs
inwards.
2. Apply glue to tabs 1 and align them with the sides of the
kangaroo. hold until dry.
3. Apply glue to tabs 2 and align them with the sides of the
kangaroo. Hold until dry.
4. Apply glue to tabs 3 on the top of the kangaroo’s head.
5. Fold tabs 3 inside the kangaroo’s head. Hold in place until dry.
6. Apply glue to tab 4 and fold over the back of the kangaroo’s
neck.
7. Apply glue to tab 5.
8. Gently curve the back strip. And apply glue to tabs 6.
9. Attach the top of the back strip to tab 5
and tabs 6 to either side of the kangaroo’s back. Hold until dry.
10. Apply glue to tabs 7, 8 and 9.
11. Attach tabs 7 to the back sides of the kangaroo and tabs 8 and
9 to the tail. Hold until dry.
12. Hop-hop-Hooray! Have a lovely day!

WIZARD ASSEMBLY
1. Crease the edges on the body template. Apply glue to tabs
1 and 2.
2. Fold in tabs 1 and 2 into the top and back of the wizard to form
body. Hold until dry. Apply glue to the blank side of the wizard’s
head and attach it to the front of the body.
3. Apply glue to tab 3 and wrap around the top of the hat until it
meets with the opposite edge. Hold until dry.
4. Fold in tabs 4, 5, 6 and 7 on the bottom of the hat and apply
glue.
5. Place the top of the hat in the center of the hat brim. Hold
until dry. Apply glue to the underside of the hat and attach it to
the top of the wizard’s head. Hold until dry.
6. Crease the edges of the cape collar. Apply glue to the three tabs
along the bottom of the collar on the blank side.
7. Attach the collar to the back and sides of the wizard’s body.
Position it just below the brim of the hat. Hold until dry.
8. Bend the collar points so that the collar flares out.
9. Crease the edges along the sides of the arm without the staff.
Apply glue to tabs 8.
10. Attach the arm to the side of the wizard, just under the collar.
Press and hold until dry.
11. Apply glue to tab 9. Attach the arm with the staff to the other
side of the wizard. Hold untild dry.
12. Alakazam! You’re a Wizard!