• Blog
    • Blog Archives
    • Latest Post
    • Silhouette Cameo Projects Archive
    • Latest Silhouette Tutorials
  • NewsLetter
  • about
  • Graphics Portfolio
  • Contact
Menu

Little Luxuries Loft

Street Address
City, State, Zip
Phone Number
PRINTABLE PARTY FAVORS

Your Custom Text Here

Little Luxuries Loft

  • Blog
  • Blog
    • Blog Archives
    • Latest Post
    • Silhouette Cameo Projects Archive
    • Latest Silhouette Tutorials
  • NewsLetter
  • about
  • Graphics Portfolio
  • Contact

Christmas Stocking Boxes

November 6, 2017 Alle C
ChristmasStockingBoxes2.jpg

These cute 'Print and Cut' Christmas Stocking boxes make fun and festive holiday favors! Plus using your Silhouette Cameo it only take a few minutes to cut and assemble. Fill them with your favorite small candies. Please read below for the assembly instructions. Each of these 'Print and Cut' design files can be purchased separately from the Silhouette America Design Store. 

DIMENSIONS
Each stocking is approximately 4" tall, 1.75" deep and 2.5" wide at the base.

SUPPLIES NEEDED
- Colour printer & ink
- Strong glue stick or double-sided tape
- White 8.5" by 11" Cardstock (65 lb) ( One sheet per stocking )
- Silhouette Cameo & Mat

stockingassembly1.jpg
stockingassembly2.jpg
stockingassembly4.jpg
stockingassembly5.jpg
stockingassembly6.jpg
stockingassembly7.jpg
stockingassembly8.jpg
stockingassembly9.jpg
stockingassembly10.jpg
PolarBearStocking.jpg

Step 1&2: Place your design within the registration guides in silhouette studio. Print the design with the registration marks onto white card stock. Select 'card-stock' as the material in your cut settings, then load your cutting mat with your design into your Silhouette Cameo. Once cut, crease the perforated edges of the main stocking piece. Next crease the edges of the strip that will run down the front of the stocking.

Step 3: Apply glue or double-sided tape to tabs 1 at the heel of the stocking. Fold in the tabs and hold until dry. 

Step 4: Apply glue to tabs 2 on the front of the stocking. Attach the front strip to the tabs, lining up the scalloped trim with the trim on the side of the stocking. Hold until dry.

Step 5: Pull back the remainder of the strip and apply glue to tabs 3, 4, 5, and 6. 

Step 6: Wrap the strip around the toe of the stocking. Make sure the all the tabs are attached and hold until dry.

Step 7: Apply glue to tabs 7 and 8 on the bottom of the stocking.

Step 8: Fold over the rest of the strip to cover the bottom tabs.  Hold until dry.

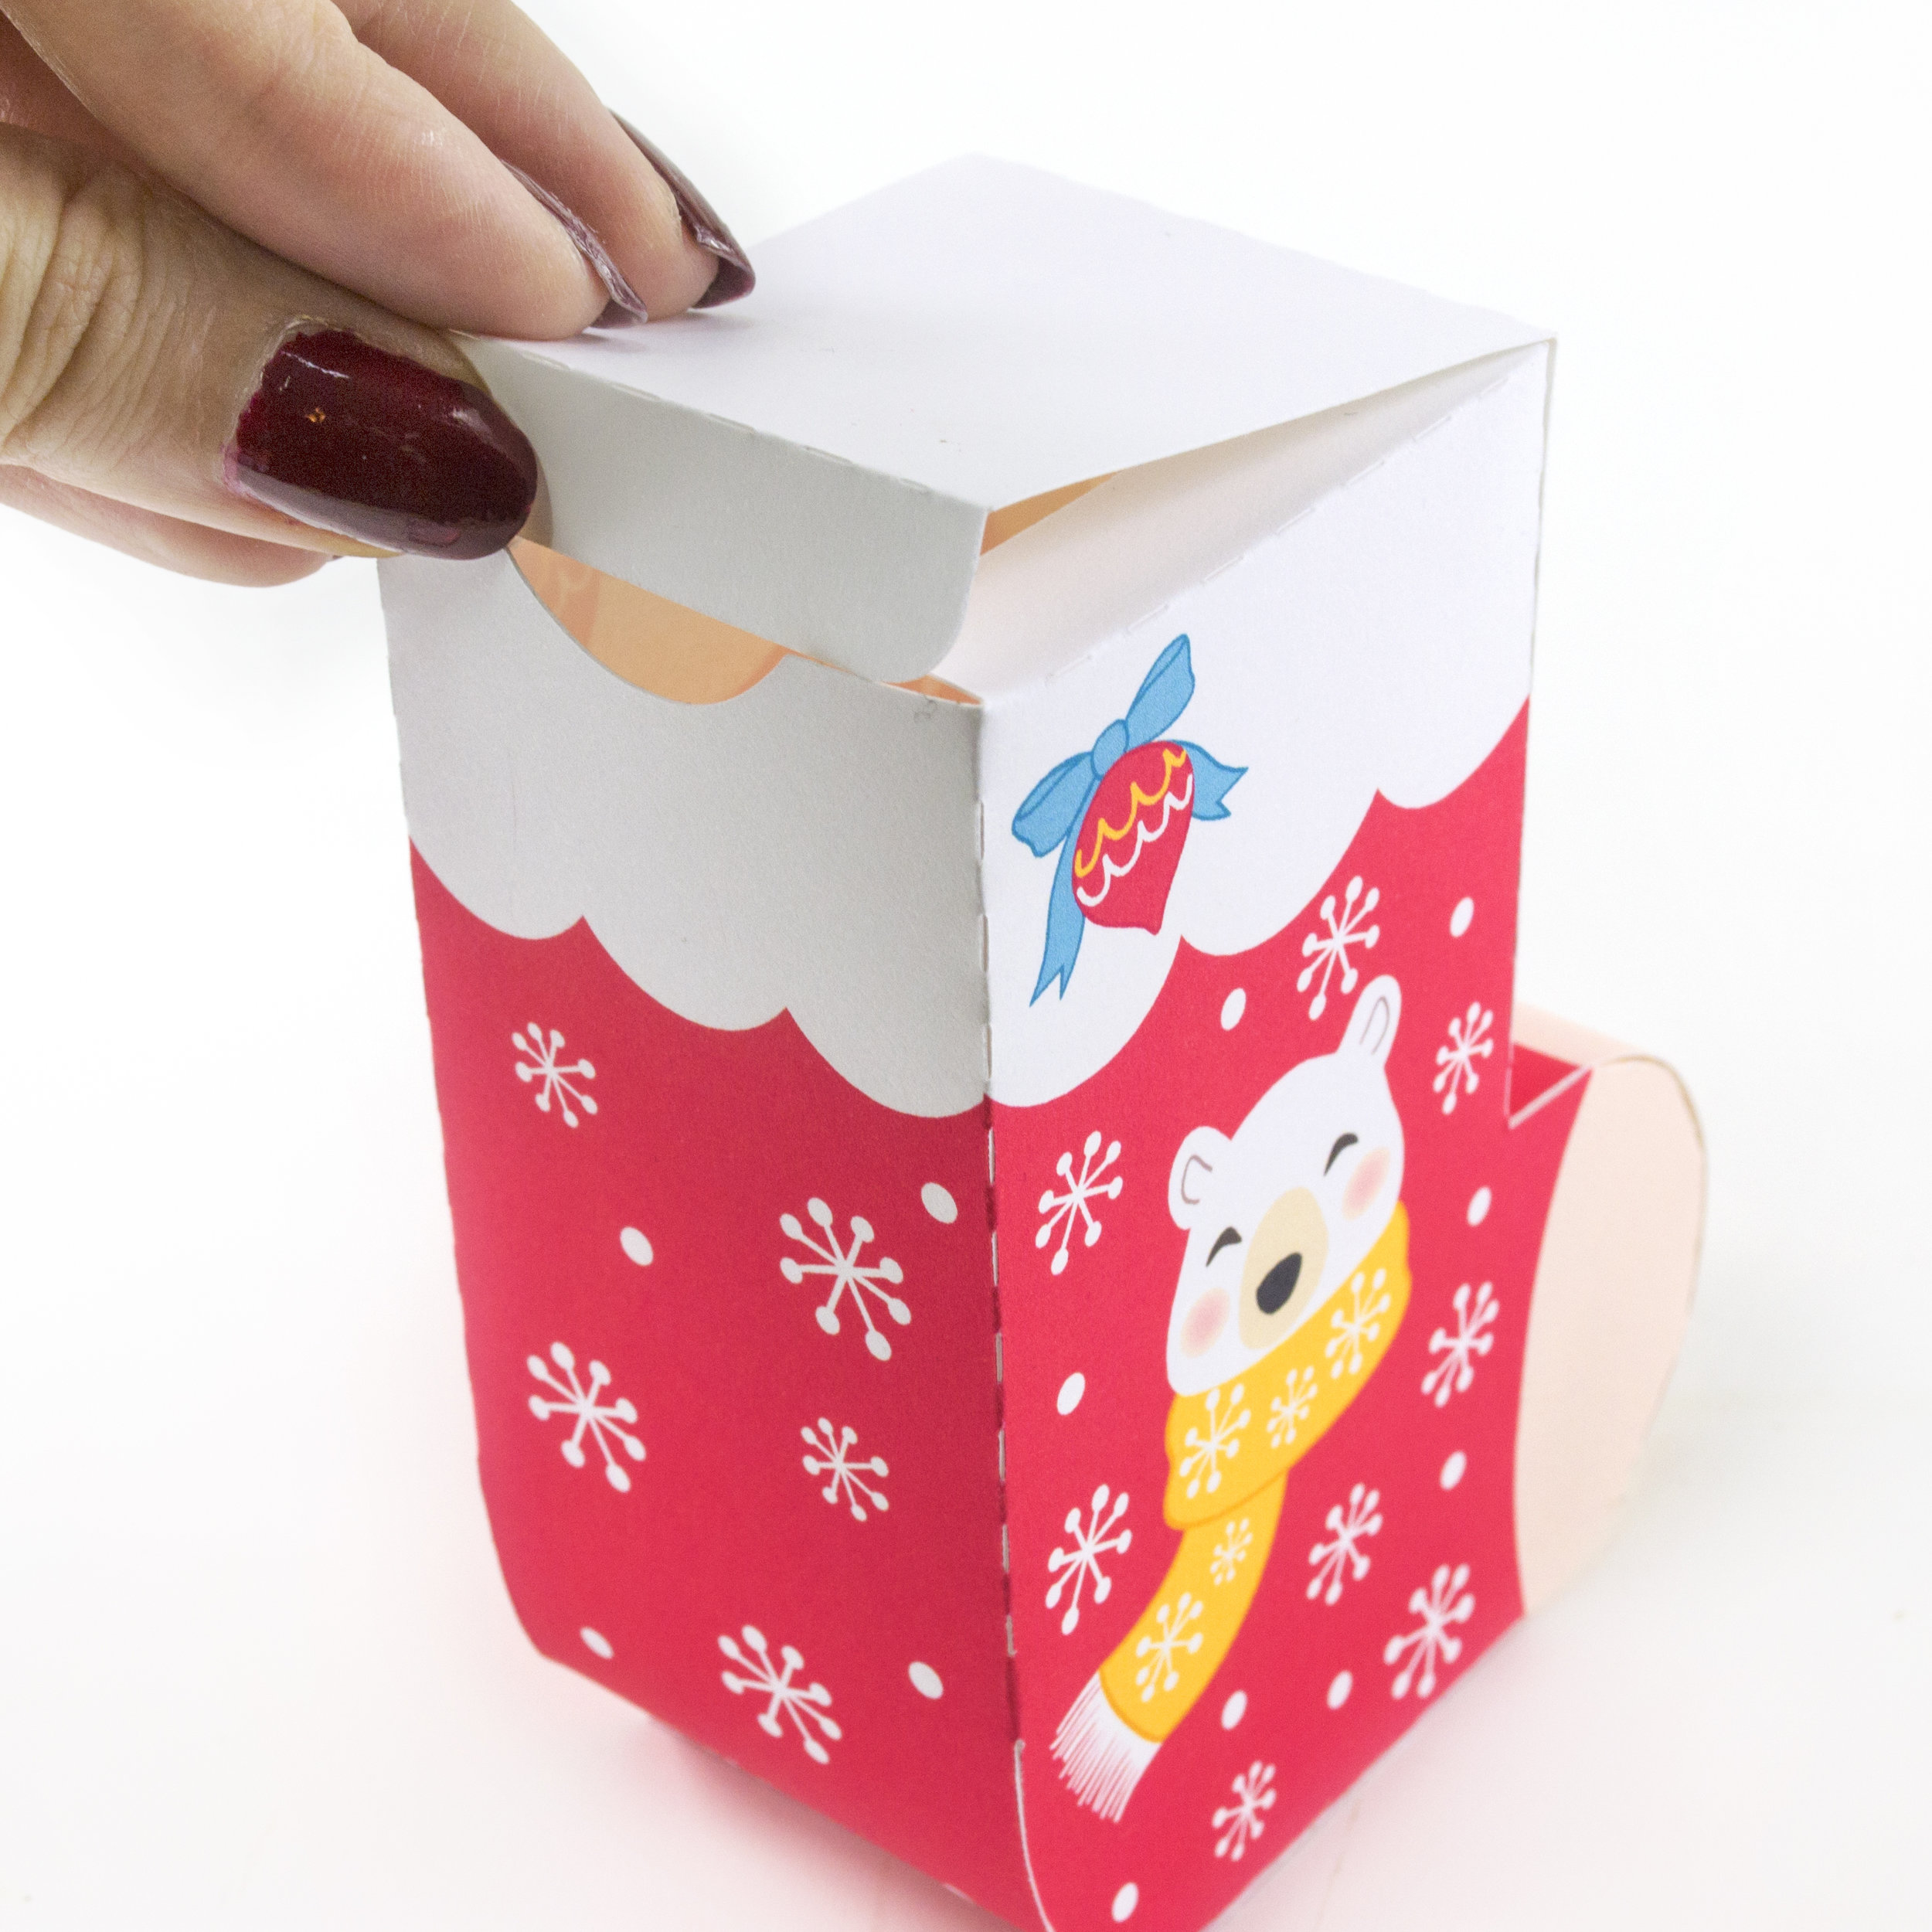
Step 9. Insert your goodies! Close the top of the stocking by folding the two white tabs inwards and sliding the last tab into the back of the stocking.

Step 10: Voila! Your stocking is ready to gift or display!


← Christmas Mini Hot Chocolate CupsHalloween Vampire Box →

Join In

Love Happy Mail? Us too! Join our monthly newsletter to receive FREE printables, special offers and more.

We respect your privacy.

Thank you!

On the Little Luxuries Loft Blog...

Featured
Create Art History Paper Toys Tutorial
Feb 15, 2018
Create Art History Paper Toys Tutorial
Feb 15, 2018
Feb 15, 2018
DIY Cupcake Stand Tutorial
Feb 10, 2017
DIY Cupcake Stand Tutorial
Feb 10, 2017
Feb 10, 2017
Gingerbread Man Printable Colouring Gift Wrap
Dec 9, 2016
Gingerbread Man Printable Colouring Gift Wrap
Dec 9, 2016
Dec 9, 2016
To Hogwarts We Will Go! Harry Potter Inspired Printable Treat Boxes
Oct 19, 2016
To Hogwarts We Will Go! Harry Potter Inspired Printable Treat Boxes
Oct 19, 2016
Oct 19, 2016
Printables For Boo-tiful Halloween Party Decor!
Oct 15, 2016
Printables For Boo-tiful Halloween Party Decor!
Oct 15, 2016
Oct 15, 2016
A Hug In A Mug! DIY Fall Latte Stencils
Sep 14, 2016
A Hug In A Mug! DIY Fall Latte Stencils
Sep 14, 2016
Sep 14, 2016
This Little Light of Mine-DIY Printable Lighthouse Tealight Holder
Aug 22, 2016
This Little Light of Mine-DIY Printable Lighthouse Tealight Holder
Aug 22, 2016
Aug 22, 2016
Easy-Peasy Lemon Squeezy! Printable Lemonade Stand Treat Box
Aug 17, 2016
Easy-Peasy Lemon Squeezy! Printable Lemonade Stand Treat Box
Aug 17, 2016
Aug 17, 2016
Let's Get Fancy! Printable Flamingo and Palms Gift Wrap
Aug 8, 2016
Let's Get Fancy! Printable Flamingo and Palms Gift Wrap
Aug 8, 2016
Aug 8, 2016
Let's Cruise! Printable Summer Gift Wrap
Jul 26, 2016
Let's Cruise! Printable Summer Gift Wrap
Jul 26, 2016
Jul 26, 2016